How to Pattern Jeans: A Step-by-Step Guide for Designers and Boutique Brands
- Share
- publisher
- Elowen
- Issue Time
- Oct 11,2025
Summary
Discover the art of patterning jeans with our comprehensive step-by-step guide, tailored for designers and boutique brands looking to elevate their collections.

Jeans are more than just durable trousers – they’re a canvas for creativity, a statement of identity, and a staple in closets worldwide. Yet, the journey from concept to finished denim garment is fraught with technical hurdles: mastering measurements, choosing the right stitch patterns, grading across multiple sizes, and ensuring the wash or embellishment you envision survives production. Whether you’re an independent denim designer, a boutique store owner, or a fashion student, understanding how to pattern jeans unlocks total control over fit, style, and production costs.
To pattern jeans, start by gathering precise body measurements and selecting essential tools—both manual (rulers, curves) and digital (CLO 3D, Lectra). Draft a basic block, add components like waistbands and fly fronts, then customize for styles (skinny, baggy, plus size). Grade patterns across size ranges, sample with muslin, refine through fit sessions, and partner with an OEM/ODM like DiZNEW to bring designs to life.

But let’s rewind to a small workshop in Guangzhou, where a young denim designer spent weeks iterating on a plus-size skinny jean pattern—only to have her sample shrink in the wash. Frustrated but undeterred, she teamed up with a factory experienced in everything from selvedge denim to bedazzling techniques. Over a single weekend, she mastered digital grading, prototype fitting, and even learned how to fray raw hems without fraying her nerves. By Monday, her boutique online shop was ready for pre-order. In this guide, you’ll get the same step-by-step insights and industry secrets to pattern jeans flawlessly every time.
What Tools and Software Do You Need to Draft a Jean Pattern?
The essential tools for drafting jean patterns include manual instruments—pattern paper, rulers, French curves, hip curves—and digital solutions like Lectra, Optitex, or CLO 3D for 3D visualization. A reliable sewing machine setup helps you test home-drafted seams. Integrating hand-drafting with software accelerates revisions and ensures precision.
Manual Tools:
• Pattern Paper (30–50 gsm): Choose sturdy, translucent paper that resists tearing during repeated adjustments.
• Straight Ruler & Hip Curve: Critical for drawing accurate waistlines, side seams, and hip contours.
• French Curve: Ideal for smoothing out the crotch curve and pocket openings.
• Tracing Wheel & Carbon Paper: For duplicating blocks when grading or testing fit changes.
Digital Pattern-Making Software:
• Lectra: Industry standard for complex grading and marker making. Offers high-precision digitizing of hand-drafted blocks.
• Optitex: Balances 2D drafting with real-time 3D sampling, allowing you to visualize how denim drapes and stretches-on-screen.
• CLO 3D & Browzwear: Top choices for stunning virtual prototyping; save time and fabric by detecting fit issues before sewing.
Integrating Hand Drafting and Digital Workflows:
• Scan or Digitize Your Blocks: Use a digitizer tablet or flatbed scanner to import your hand-drafted patterns.
• Layering & Annotation: In your CAD software, create separate layers for seam allowances, notches, grading points, and pattern labels.
• Version Control: Maintain a clear naming convention (e.g., “Jean_Block_V1_Date” and “Jean_Block_V2_Date”) to track revisions.
• Print-out Strategy: Use plotters that handle large format paper to print life-size patterns for sample cutting.
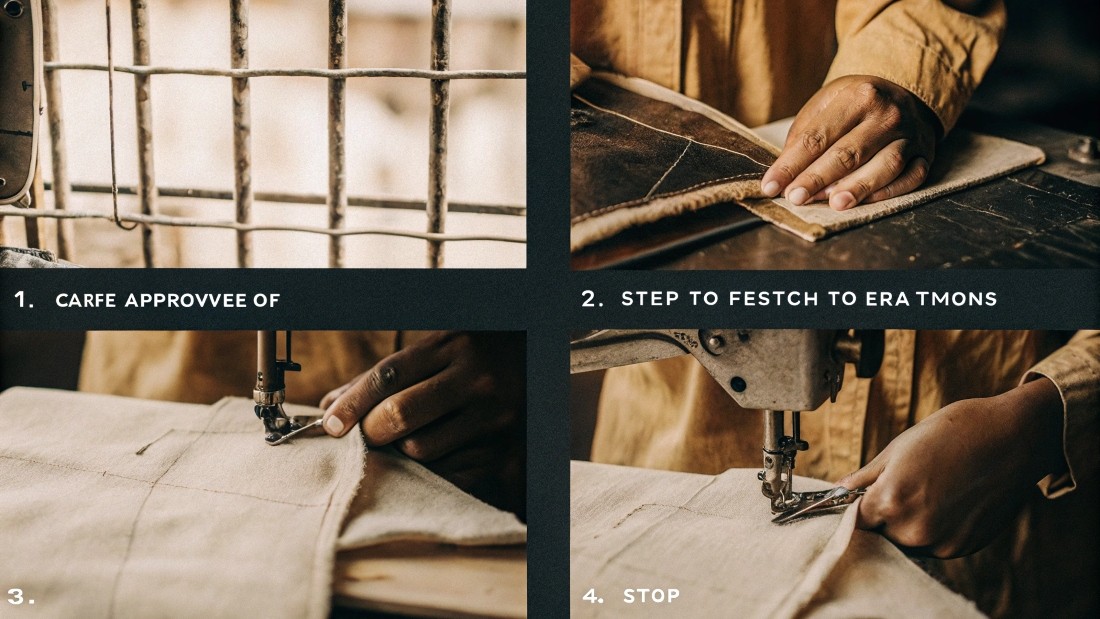
How to Stitch Jeans at Home: Basic Sewing Machine Setup and Techniques
• Use a heavy-duty industrial or semi-industrial machine with a walking foot to handle thick denim layers.
• Select thread weight between Tex 40 and Tex 70 for topstitching; use Tex 27–40 for internal seams.
• Practice chain stitching for waistbands and flat felled seams for side seams to replicate factory-grade durability.
Whether you’re sketching first drafts by hand or adjusting seamlines in a 3D simulation, a hybrid toolkit maximizes flexibility. By combining time-tested manual methods with cutting-edge software, designers can iterate swiftly and develop patterns that transition seamlessly from screen to cutting table.
How Do You Create a Basic Jean Block Pattern?
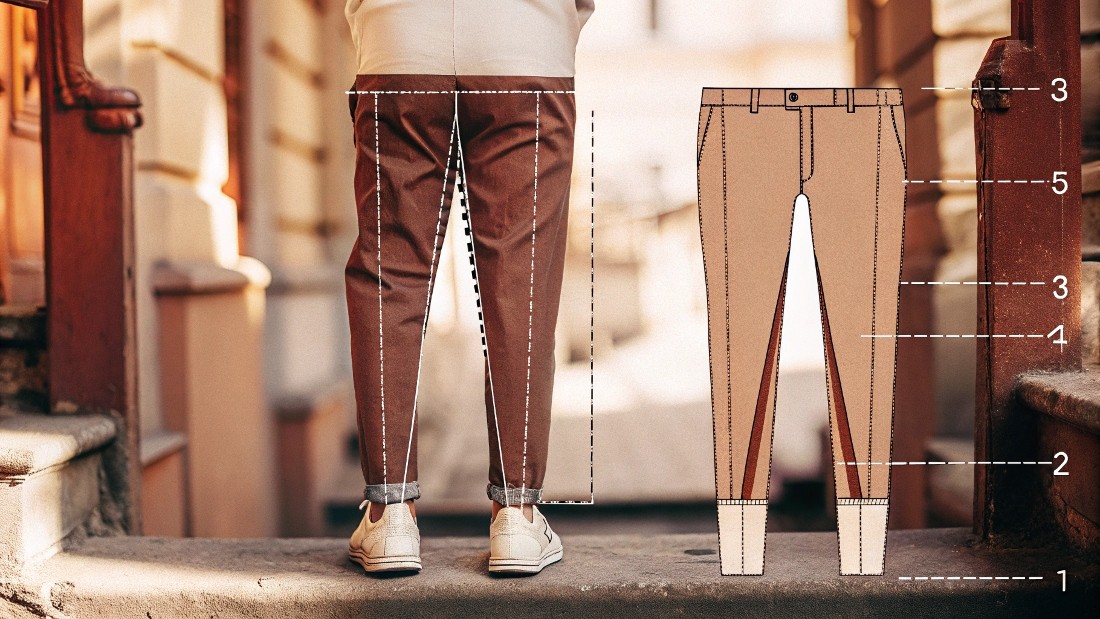
To draft a basic jean block, begin with precise waist, hip, thigh, and seat measurements plus ease allowances. Sketch front and back blocks on pattern paper or CAD: add crotch depth, define grainline, and incorporate seam allowances. Integrate foundational elements—waistband, fly extension, coin pocket—and mark drilling locations for rivets and button placement. This block serves as the base for all jean styles.

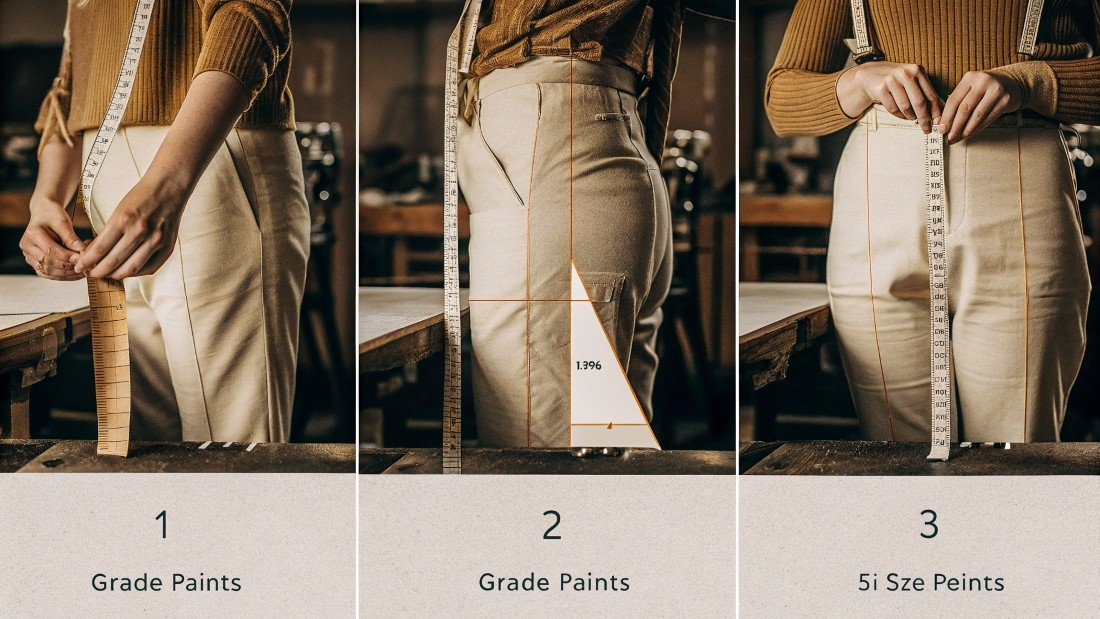
Taking Accurate Body Measurements and Ease Allowances
– Waist: Measured at the smallest part of the torso.
– Hip: At the fullest point of the seat.
– Thigh: 3” down from the crotch along the leg.
– Crotch Depth: Seated measurement from waist to chair level.
– Ease: Jeans typically use negative to zero ease at waist, ‘hip ease’ of 1–2” for slim fits, and up to 4–6” for loose silhouettes.
Drafting the Front Block
– Draw vertical grainline and horizontal waistline.
– Lay off half-hip width plus ease along waistline.
– Mark thigh measurement at 3” down; connect to hip for side seam.
– Establish crotch curve: use French curve and adjust until comfortable fit.
Drafting the Back Block
– Account for fuller seat: add 1/4”–1/2” additional width.
– Extend crotch depth by 1/2”–1” for back rise.
– Shape back crotch curve with deeper, more pronounced curve.
Adding the Waistband, Fly, and Pocket Foundations
– Waistband: 1.5”–2” wide; interface with non-woven or denim on bias for stretch control.
– Fly Extension: 1.5”–2” draft, with interfacing, overlapping by 1/2”–3/4”.
– Front Pocket Bag: Standard depth of 7”–8” with curved or square openings.
– Coin Pocket: 3” wide, placed within front pocket for authenticity.
– Rivet & Button Markings: Drill points at pocket corners and waistband center.
Selecting Stitch Patterns: What Stitch Pattern Is Best for Jeans?
– Flat-felled seams: Highly durable, encapsulating raw edges.
– Chain stitch: Offers elasticity in waistbands; beware of puckering.
– Topstitching: Use double-needle for parallel lines, typically in contrasting thread (golden or orange).
From raw measurements to a fully drafted block, this foundational pattern is your template for iterations. Keep your first block simple—without style details—so you can focus on fit. Once perfected, you’ll adapt it for every silhouette, wash, and embellishment in your denim lineup.
How Can You Customize Patterns for Different Jean Styles?
Customizing jean patterns involves overlaying the basic block with shape-specific modifications: taper legs for skinnies, add width and drop crotch for baggy styles, stack extra fabric length at the hem for stacked jeans, or adjust inseam and ankle openings for jogger silhouettes. For plus sizes, distribute hip and thigh ease proportionally. Incorporate special fabric characteristics—selvedge denim shrinkage or stretch levels—to fine-tune your pattern.
Designing Plus-Size and Curvy-Fit Patterns
– Proportional Grading: Apply larger grading increments at hip and thigh than waist.
– Seat Curve: Soften angle to accommodate fuller derriere.
– Rise Depth: Increase front and back rise by 0.5”–1” for comfort.
– Visual Balance: Use princess seams or yokes to create vertical lines that elongate the silhouette.
Adapting to Baggy, Stacked, Skinny, and Jogger Silhouettes
– Skinny Jeans: Reduce hem circumference to 11”–13”; taper from knee to ankle.
– Baggy Jeans: Increase thigh width by 2”–4”; drop crotch by 1”–3”.
– Stacked Jeans: Add extra length (2”–5”) below knee; hem stacking controlled by fold location.
– Jogger Jeans: Taper from knee to ankle; add elastic or drawstring casing at hem.
Sample Measurements for Four Silhouettes
Style | Waist Ease | Hip Ease | Thigh Width | Hem Circumference | Rise Adjustment |
Skinny | 0″ | 1″ | –2″ | 12″ | –0.5″ |
Baggy | 2″ | 4″ | +3″ | 20″ | +1″ |
Stacked | 1″ | 2″ | +1″ | 14″ | +0.5″ |
Jogger | 1″ | 2″ | 0″ | 16″ (elastic) | 0″ |
Incorporating Fabric Characteristics
– Selvedge Denim: Anticipate 3%–5% shrinkage; draft with negative ease.
– Stretch Denim (2%–4% Lycra): Allow less ease; test bias stretch recovery.
– Rigid Denim: Add more room at hip and thigh; prefer relaxed cuts.
What’s the Easiest Way to Fray Jeans?
– Manual Distressing: Use sandpaper or pumice stones at hem edges.
– Chemical Fraying: Apply reactive solutions to weaken fibers, then mechanical agitating.
– Laser Fraying: Factory-grade technique for precision without weakening overall structure.
– Pattern Integration: Draft oversized hem allowances so fray happens in the extra fabric portion.
How to Permanently Bedazzle Jeans: Embellishment Techniques
– Rivets & Studs: Drill holes in pattern to mark placement; reinforce with interfacing.
– Rhinestones & Crystals: Use hot-fix applicators; ensure the pattern accounts for added weight.
– Embroidery: Integrate pocket facing with tear-away stabilizer; adjust pocket pattern for stitch density.
– Patchwork & Appliqué: Plan seam allowances to tuck raw edges under decorative patches.
By tailoring your base block with these targeted adjustments, you’ll cater to any denim trend or niche market demand. Whether your customer wants the clean lines of a skinny jean or the lived-in cool of frayed baggies, your pattern library will be ready for immediate production.
How Do You Grade Your Jean Pattern Across Multiple Sizes?
Grading involves scaling your base pattern up or down to create a size range. Use point-to-point grading rules—often 1/4”–1/2” increments at waist, hip, and thigh per size—and mark grade points on the pattern. Digital grading in software like Lectra ensures precision and speed; manual grading with rulers and perpendicular slash-and-spread methods works for smaller ranges. Always produce a graded set for sample garments to validate consistent fit from size 24 to 38 (US).
Understanding Grading Rules and Point-Marking Methods
– Horizontal vs. Vertical Grading: Apply waist and hip adjustments horizontally; rise and length vertically.
– Grade Rule Charts: Define increments per size (e.g., +1/8” waist at front center, +1/4” at side seam).
– Grade Points: Mark critical pattern intersections—waist level, fullest hip, crotch point, knee, hem.
Digital Grading Versus Manual Grading Techniques
– Digital Grading:
• Speed: Batch-process size ranges in minutes.
• Accuracy: Software calculates spline curves and maintains grainline integrity.
• Versioning: Easily revert or adjust grading rules.
– Manual Grading:
• Slash & Spread: Cut pattern along grade lines, spread by measured amount, tape onto new paper.
• Ruler & Curve: Redraw smooth lines between grade points; time-intensive but low-tech.
• Ideal for one-off prototypes or small production runs.
Ensuring Fit Consistency from Size 24 to 38 and Beyond
– Fit Models: Use live fit sessions with models representing small, medium, and large size brackets.
– Tolerance Rules: Allow ±1/4” fitting tolerance on key measurements when sampling.
– Fit Tracking: Log adjustments per size to refine grading rules over time.
– Shrinkage Compensation: For rigid denim, draft each grade with shrinkage allowance to avoid size drift post-wash.
Quality Control in Graded Patterns
– Marker Efficiency: Plan fabric lay plans to minimize waste—aim for 1.5:1 lay ratio or better.
– Pattern Audits: Randomly check printed pattern measurements against digital specs.
– Version Lock: Once grading is approved, lock the pattern set to prevent unauthorized changes.
Grading transforms one pattern into a full collection, enabling scalable production and consistent fit across your brand’s offer. By mastering grading rules and leveraging digital tools, you streamline production and minimize costly fit errors.
How Do You Prototype, Test, and Refine Your Jean Patterns?
Prototyping begins with creating muslin or calico samples to test basic block fit. Once approved, cut denim prototypes, assemble with factory-level stitch patterns (flat-felled seams, chain-stitch topstitching), and conduct fit sessions. Document adjustments in tech packs—including pattern changes, grainline shifts, and trim placements—and iterate until the garment matches your design intent. This process ensures production-ready patterns and smooth OEM/ODM handoff.
Sampling Processes: From Muslin to Denim Prototypes
– Muslin Samples: Quick, low-cost fabric tests to check block proportions and motion ease.
– Calico/Toile: Closer to final garment weight but still inexpensive; validate pocket placements and waistband fit.
– Denim Prototypes: Final test garment in intended fabric, wash, and thread. Include all hardware (buttons, rivets).
Fit Sessions and Iterative Adjustments
– Fit Teams: Designer, pattern maker, and fit model collaborate in real time.
– Fit Checklist: Record comfort, tightness, rise height, seat pull lines, knee bend, and hem break.
– Adjustment Log: Note pattern modifications (e.g., “reduce front thigh by 1/2” at side seam”) and retest.
Preparing Tech Packs for OEM/ODM Production with DiZNEW
– DiZNEW Tech Pack Template: Customize fields for pattern files, grading specs, trim details, and wash instructions.
– 3D Renderings: Attach digital mockups from CLO 3D or Browzwear for visual reference.
– Trim & Hardware Specs: List button type, rivet dimensions, pocket bag lining weight, and thread color codes.
– Quality Standards: Define stitch count per inch, seam allowance tolerances, and fabric inspection criteria.
– Production Timeline: Outline sampling lead time (2–3 weeks), PP sample approval (1 week), full-run production (4–6 weeks).
Cost & Minimum Order Quantities Table
| Stage | MOQ | Lead Time | Unit Cost Estimate |
| Prototype Run | 30 pcs | 2–3 weeks | $25–$40 per piece |
| Small Production | 500 pcs | 4–6 weeks | $15–$25 per piece |
| Bulk Production | 10,000+ pcs | 8–10 weeks | $8–$15 per piece |
By rigorously prototyping and refining, you ensure that your final jean patterns meet both design vision and wear-test standards before committing to full production. With DiZNEW’s transparent MOQ options and experienced OEM/ODM services, scaling from boutique launches to large-volume orders is seamless.
How Can You Partner with a Factory Like DiZNEW to Bring Your Jean Patterns to Life?
Partnering with DiZNEW means tapping into 20+ years of denim expertise, flexible MOQs (30 pieces minimum), and capacity for large runs (up to 10,000 pieces). Their end-to-end OEM/ODM service covers pattern digitizing, grading, sampling, custom hardware, wash development, and on-time delivery. Designers and boutique brands benefit from direct factory communication, cost efficiency, and quality control. Simply submit your tech pack or sketch, and DiZNEW will handle everything from fabric sourcing to finished jeans in your label.
Why Choose DiZNEW?
– Experience: Over two decades specializing in custom denim R&D, manufacturing, and sales.
– Style Range: Expertise in plus size, baggy, stacked, skinny, straight, selvedge, jogger jeans, and denim tops.
– Quality Assurance: In-house inspection labs, ISO certifications, and third-party audits ensure consistency.
– Customer Profile: Serving U.S. small-medium buyers, high-end brands, designers, and e-boutique owners.
OEM vs. ODM vs. Custom Brand Service
– OEM: You supply design and brand specs; DiZNEW manufactures under your label.
– ODM: DiZNEW offers proprietary designs and patterns you can rebrand.
– Fully Custom: From initial concept sketches or tech pack to final production, every detail is tailored.
Streamlined Communication and Project Management
– Dedicated Account Manager: Single point of contact for design queries, production updates, and quality issues.
– Milestone Reporting: Weekly updates on sampling, cutting, stitching, washing, and final QC.
– Digital Collaboration: Shared cloud folder with pattern files (DXF, AI, PDF), tech pack revisions, and wash test results.
Fabric Sourcing and Wash Development
– Global Network: Partnerships with mills in China, Turkey, and Pakistan for selvedge and stretch denim.
– Wash Lab: Custom enzyme, ozone, laser, and hand-sand wash options with photo documentation of each run.
– Sustainability: Organic cotton, low-water washes, and recycled denim blends available.
Scaling from 30 to 10,000 Pieces
– Low MOQ Launch: Test new designs with 30–100 pcs to validate market demand.
– Mid-Size Runs: Scale to 500–2,000 pcs once you’ve optimized sizing and wash.
– Bulk Production: Efficient marker making and batch cutting achieve up to 10,000+ pcs per order.
With DiZNEW’s end-to-end capabilities, designers maintain creative control while leveraging factory precision. From pattern development to final shipment, you gain a reliable partner who understands both the art and science of denim production.
Ready to take your jean designs from sketch to shelf? DiZNEW’s 20+ years of denim expertise, flexible MOQs starting at just 30 pieces, and full OEM/ODM service empower you to launch or expand your denim line with confidence. Whether you need intricate plus-size patterns, complex embellishments like bedazzling, or high-volume runs, we’ve got you covered. Contact our team today with your tech pack or design sketch, and let’s bring your next denim collection to life.
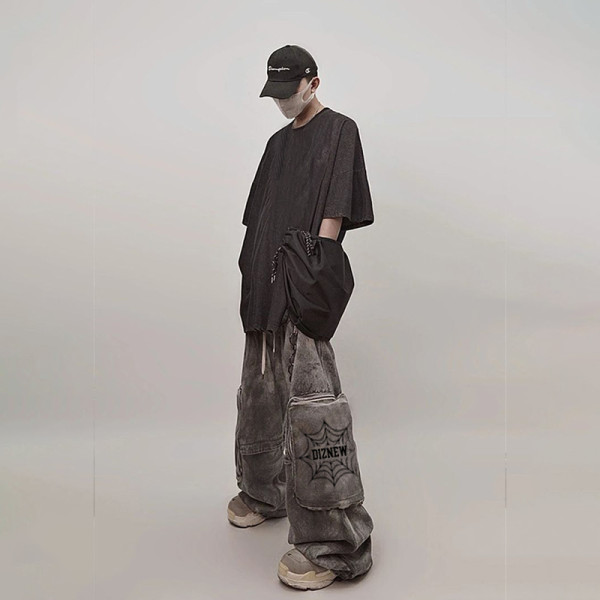
OEM & ODM Custom Loose Grey Utility Jeans for Wholesale, crafted for style and comfort. Perfect for trendy brands and retailers.

Wholesale Stylish Ash Gray Wide-Leg Denim Trousers. OEM/ODM services for custom designs that elevate your brand's denim collection.

OEM/ODM Custom Green Loose Wide-Leg Jeans for brands seeking unique styles. Perfect for wholesale and tailored fits

Discover our Custom Detachable Floral Cargo Jeans—crafted for comfort and style. Offering OEM/ODM and wholesale options for your brand!