How to Make Your Own Jeans Pattern: Free PDF Templates
- Share
- Issue Time
- Oct 9,2025
Summary
Learn to make your own jeans pattern effortlessly! Download our free PDF templates and start crafting the perfect fit for your style today.
Ever spent hours scrolling through online stores, convinced you’ve finally found “the” pair of jeans, only to be greeted by awkward waist gapping, baggy thighs, or a rise that sits all wrong? You’re not alone—finding a perfect fit off the rack can feel like chasing a unicorn.
That’s why more designers, boutique owners, and DIY enthusiasts are taking matters into their own hands: drafting custom jeans patterns. When you craft your own jeans pattern, you control every curve, every seam allowance, and every ounce of ease, ensuring a fit and style uniquely tailored to you or your target market.
To make your own jeans pattern, start by taking precise body measurements (waist, hip, thigh, rise, inseam) and gather essential tools (measuring tape, rulers, pattern paper, French curve). Draft basic front and back blocks by hand or use a free PDF template. Adjust for style variations—skinny, baggy, plus size—and incorporate denim-specific details like pockets and topstitching. Finally, test with a mock-up, refine the fit, digitize your pattern, and prepare for production or launch your brand.
Picture this: a rising indie designer in Los Angeles sketches her first jeans block on pattern paper, adds a daring low-rise curve, and a month later sees her collection featured in an online boutique spotlight. Ready to start your own jean-making journey? Keep reading—your dream denim pattern is closer than you think.
What Measurements and Tools Are Essential for Drafting Your Own Jeans Pattern?
First, gather precise body measurements: waist (at narrowest point), high hip, full hip, thigh, front and back rise, knee, and inseam lengths. Essential tools include a flexible measuring tape, clear ruler, French curve, pattern paper (or butcher paper), pencil/eraser, pattern notcher, and weights or pins. Digital enthusiasts can also use CAD software and a home printer to work with PDF templates. Accurate measurements and the right tools set the foundation for a well-fitting jeans pattern.
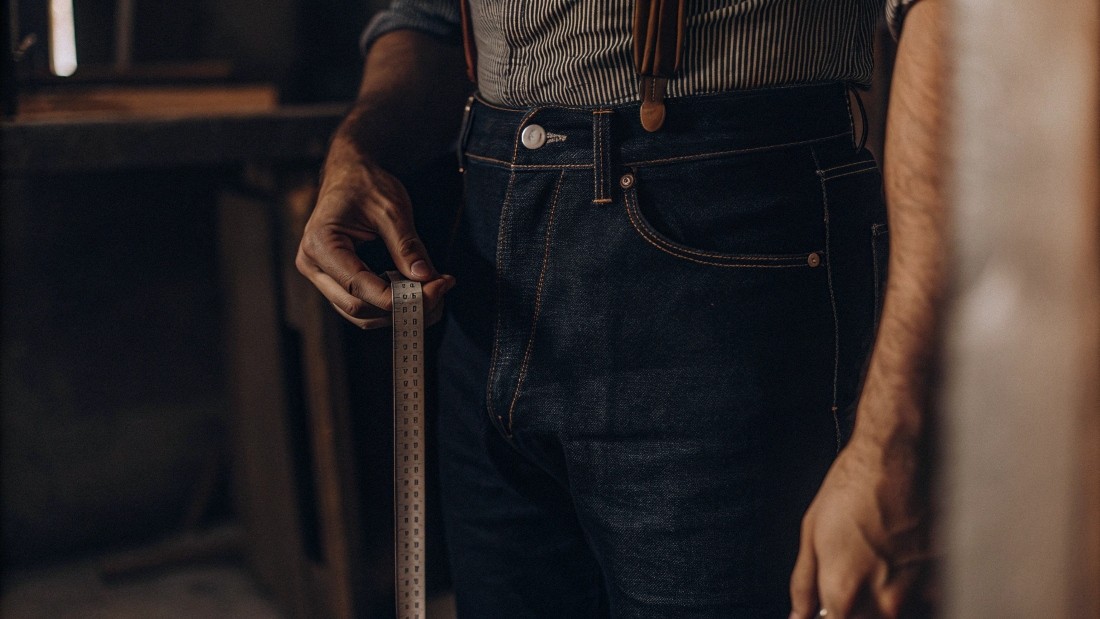
Drafting a jeans pattern starts with reliable measurements. Waist, high hip, full hip, thigh, knee, and inseam are your pillars. Many beginners overlook the difference between front rise and back rise—yet this small distinction can make or break comfort and fit.
Front rise typically ranges from 8–10 inches for women and 9–11 inches for men, while back rise adds an extra 1–2 inches to accommodate the seat. Take each measurement three times and average them to reduce error.
Your toolkit might look simple, but each item plays a vital role:
Measuring Tape: A high-quality, flexible tape with both inches and centimeters.
Clear Ruler (18–24 inches): For drawing straight waistlines and side seams.
French Curve: To smoothly connect waist to hip lines and shape the crotch curve.
Pattern Paper: Heavyweight (30–50 GSM) to withstand repeated tracing. Butcher paper works in a pinch.
Pencil & Eraser: A mechanical pencil keeps lines sharp; a soft eraser corrects mistakes without tearing the paper.
Pattern Notcher: Marks notch points—key for aligning front and back during sewing.
Pattern Weights or Pins: Hold paper steady on your table or fabric.
CAD Software & Printer (Optional): Tools like Optitex, Lectra, or free PDF templates let you draft digitally and print a tiled pattern at home.
Critically, don’t underestimate digital vs. analog. While CAD tools speed up grading and modifications, hand-drafted patterns help you internalize the shape and fit. For beginners, start with paper: you’ll learn how each curve impacts the final garment.
Later, transition to digital for efficiency and scalability—especially if you plan to make a jeans brand. DiZNEW’s in-house CAD team can convert your hand-drafted blocks into production-ready digital files, ensuring pixel-perfect precision for large batches.
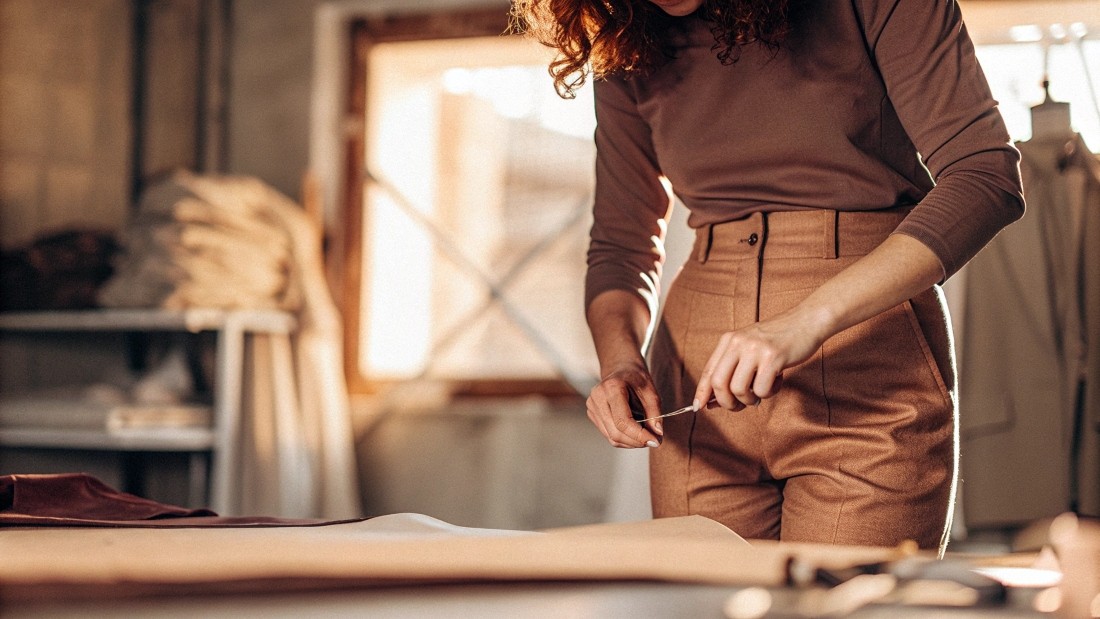
How Do You Create the Basic Front and Back Blocks by Hand or Using a PDF Template?
Begin your front block by drawing a vertical grainline equal to half your hip measurement plus ease. Mark the waistline, hip line, and crotch depth (front rise). Use a French curve to shape the crotch seam and side seam. For the back block, extend the rise by 1–2 inches, add seat fullness, and draft a slightly curved crotch seam for comfort. Alternatively, download a free PDF jeans pattern, print at 100%, align with registration marks, and tape pages together.
Hand-drafting your front and back blocks is a rite of passage for denim patternmakers. You’ll develop an intuitive feel for curves, seam allowances, and ease distribution. Start on pattern paper: draw a vertical line (the center front or center back), then mark:
1. Waistline – At the top.
2. Hip Line – Approximately 8–9 inches below the waist (adjust based on your measurements).
3. Crotch Depth – The front rise measurement down from the waistline.
4. Knee Line – Midpoint between crotch point and hem.
5. Hem Width – Desired ankle or thigh opening.
Front Block
From center front, measure horizontally half-hip plus 1–2 inches ease.
Draw the side seam from waist to crotch, then from crotch to hem.
Shape the crotch curve with a French curve—aim for a smooth, ergonomic line that mimics the body’s natural curve.
Mark the pocket opening (typically 6–7 inches from the waist) and freehand the pocket bag depth.
Back Block
Use center back as your vertical guide.
Add 1–2 inches more to the back rise than the front rise—this extra material shapes the seat.
Plot half-hip plus ease for side seams.
Draft a deeper crotch curve; this improves mobility and fit.
Don’t forget the back yoke—draft a 3–4 inch wide yoke above the seat for shaping.
Using PDF Templates
If you’re new to pattern drafting, a free jeans pattern PDF can fast-track your learning curve. Search online for “free jeans pattern” or “jeans pattern for ladies,” download the file, and print at full-scale. Use your printer’s borderless setting or tile the pattern across multiple sheets, then carefully trim borders, align registration marks, and tape pieces together. Verify scale by measuring a printed reference line before cutting.
Critical Considerations
Ease Distribution: Too much ease yields a slouchy look; too little makes denim feel constrictive. Aim for 1–2 inches of ease at the hip for slim jeans, 3–4 inches for relaxed fits.
Grainline Accuracy: Always maintain the grainline perpendicular to the waistline—misplaced grain causes twisting.
Symmetry vs. Draft Variations: Mirror one side for symmetry, but be prepared to tweak based on personal posture (e.g., anterior pelvic tilt, hip rotation).
Seam Allowances: Standard 5/8 inch for side seams, 1/2 inch for hems. Mark these clearly to avoid confusion during sewing.
By alternating between hand drafting and PDF templates, you’ll build expertise and speed. When you’re ready for production, DiZNEW’s PDF-to-pattern services can digitize your blocks, providing DXF and PLT files compatible with plotters worldwide.
What Adjustments Should You Make When Making Your Own Jeans from Scratch?
Adjust your basic block for style: reduce side-seam width by 1–2 inches for skinny jeans, add 3–4 inches ease for baggy fits, and increase rise for high-waist styles. For plus sizes, redistribute ease across waist and thigh, and lengthen inseam as needed. Draft stacked jeans with extra leg length and straight styles with consistent leg width from hip to hem.

Once your blocks are solid, style customization takes center stage. Here’s how to morph your base into signature silhouettes:
1. Skinny Jeans
Side-Seam Reduction: Trim 1–2 inches from the outer leg line.
Knee Taper: Add a gradual taper from mid-thigh to ankle—aim for 12–15 inches hem width.
Lower Rise Option: For low-rise skinny jeans, subtract 1 inch from front and back rise. Keep in mind, reducing rise shifts the hip line, so test with a muslin.
2. Baggy & Relaxed Fits
Increase Side-Seam Ease: Add 3–5 inches to the hip and thigh.
Straight Leg: Maintain a consistent width (18–20 inches at hem).
High Rise: Add 1 inch to both rises for a vintage “mom jean” feel.
3. Straight & Classic Cuts
Minimal Taper: Keep the knee to hem measurement within 2–3 inches of the thigh measurement.
Mid-Rise: Standard 10–11 inch rise works for most.
Slight Ease: 2–3 inches at hip for comfortable movement without bulk.
4. Stacked Jeans
Extra Length: Add 4–6 inches to the inseam.
Leg Width: Similar to skinny jeans but with extra length for that crushed-on-top-of-boots look.
Hem Finish: Consider pointed side seams or asymmetrical slit hems to enhance stacking.
5. Plus Sizes
Proportional Increases: For sizes 14–24, add ease proportionally—4–6 inches at hip, 2–4 inches at waist, and extra 1–2 inches at thigh.
Longer Rise: Increase both front and back rises by 1–1.5 inches for comfort.
Wider Crotch Curve: Expand crotch curve width by 0.5–1 inch to prevent riding.
Practical Tips
Use a Muslin Mock-Up: Before cutting denim, make a toile in a lightweight fabric. Pin any excess or gaps to map adjustments.
Document Changes: Number each pattern iteration. Keep notes on what you added or removed—this log saves hours in future tweaks.
Test with Fabric Swatches: Denim weights vary (8 oz for lightweight, up to 16 oz for heavy selvedge). Stretch and drape differ, so always sample with your intended denim.
Balance Aesthetics and Function: A bold low-rise curve might look great in design sketches but could lead to wedgies or discomfort. Always prioritize wearability.
By mastering these adjustments, you’ll confidently design everything from a slim streetwear staple to a luxurious high-waist baggy jean. And if you need large-scale pattern grading across multiple sizes, DiZNEW’s experienced pattern engineers can handle up to 20 size points in one run.
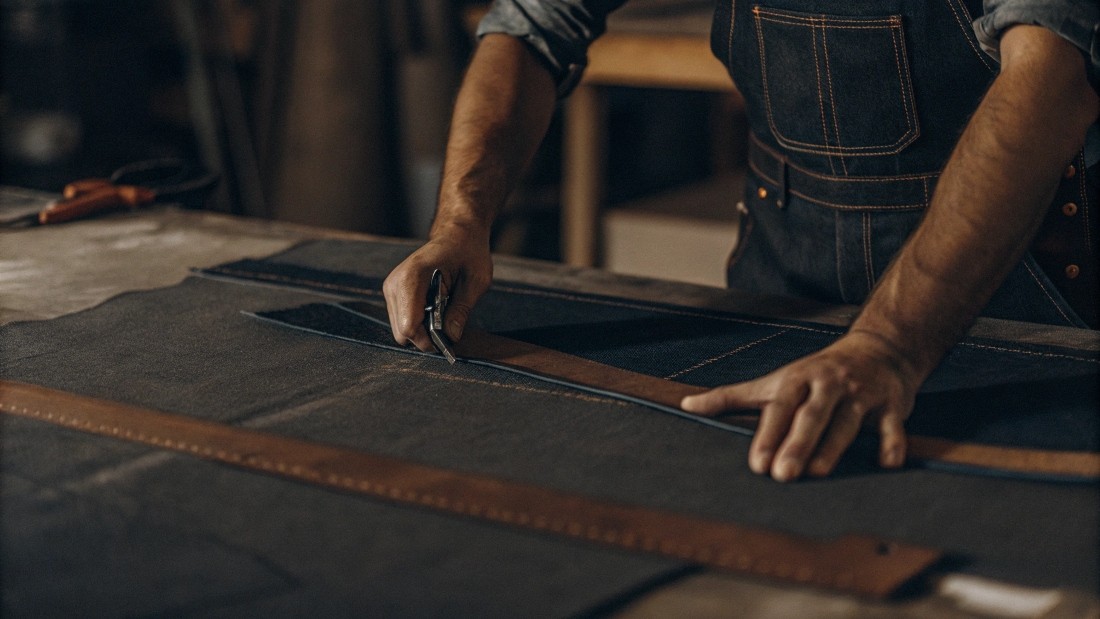
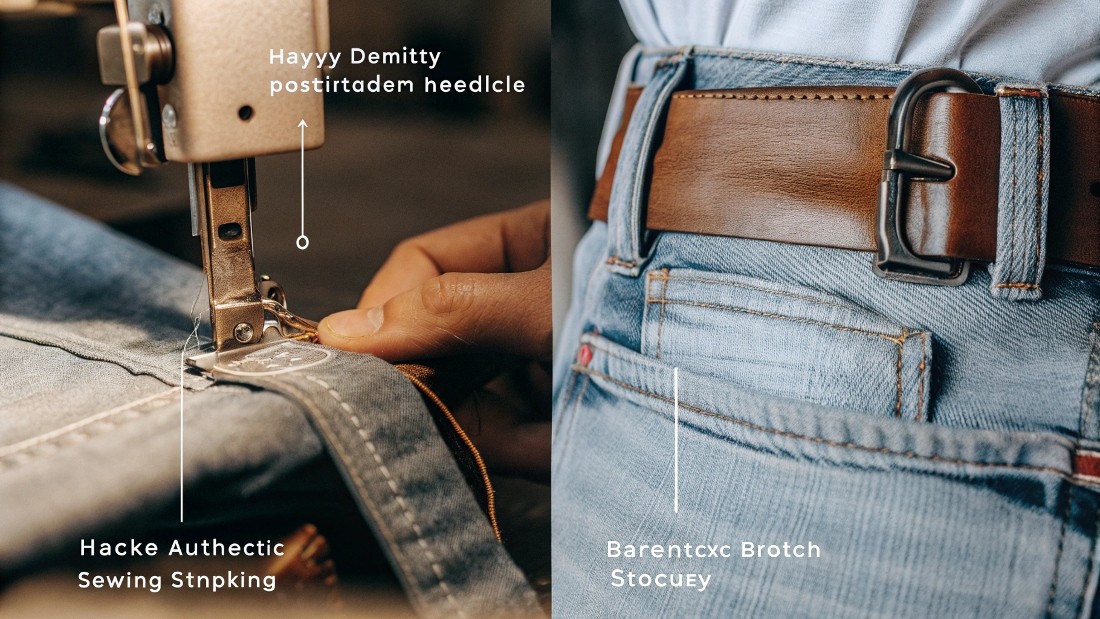
How Can You Incorporate Denim-Specific Details and Sew Jeans by Hand?
Denim’s unique characteristics demand special techniques: use a heavy-duty denim needle, waxed or topstitching thread, and consider chain-stitch hems for authentic stretch and durability. Hand-sewing details like bartacks, bartax back pocket embroidery, and custom topstitching adds artisanal value. Incorporate classic five-pocket construction, yoke shaping, rivets at pocket stress points, and belt loops sized for your preferred belt width.
Denim is tough. It’s sturdy, often non-stretch, and requires robust sewing methods. If you plan to sew jeans by hand—maybe you’re making a one-off prototype or adding hand-stitched embellishment—you’ll need:
Tools & Materials
Denim Needles: Size 14/90 or 16/100—sharp enough to penetrate layers.
Heavy Thread: Polyester or cotton-wrapped-poly, 30–40 weight for topstitching.
Thimble: Protect your fingers and push needles through thick denim.
Awl or Leather Punch: Pre-punch holes for buttonholes or rivets.
Waxed Thread (Optional): For a rustic, hand-crafted look.
Key Techniques
1. Fell Seams by Hand
Align seams right sides together, stitch a standard running stitch with 0.25 inch from edge.
Fold one seam allowance over the other, then sew a second line of stitches along folded edge—this encloses raw edges and mimics machine double-topstitching.
2. Bartack Reinforcement
At pocket corners and fly openings, wrap thread around your needle multiple times (8–12 doff loops) before inserting. This concentrates strength at stress points.
3. Chain-Stitch Hem (by Machine or Hand)
Machine chain-stitch is ideal, but you can mimic with hand chain-stitch using a looped stitch and a long-arm needle. The resulting stretchable hem moves with the wearer and resists breakage.
4. Pockets & Yoke
Draft pocket bags 7–9 inches deep; overcast edges by hand to prevent fray.
Hand-topstitch 0.5 inch from pocket edge with contrasting thread for a classic denim look.
For the yoke, use a single or double felled seam—reinforce with bartacks at ends.
Hardware & Finishes
Rivets: Use a rivet setter to hammer in copper or brass rivets—classic at pocket stress points.
Button Fly vs. Zipper: Hand-stitch bartacks at top and bottom of zippers, or install metal jeans buttons with a hand press.
Belt Loops: Typically 2 inches wide, 5–6 inches long. Hand-fold, stitch, and attach with bartacks.
By hand-sewing critical details, your jeans gain an artisanal edge. This level of craftsmanship resonates with boutique shoppers and premium brands. When you transition to production, DiZNEW’s production lines handle both heavy-duty machine chain-stitching and custom hardware sourcing across 10+ finishes (antique brass, nickel, copper) to match your brand aesthetic.
How Do You Test, Refine, Digitize Your Pattern—and Even Launch Your Own Jeans Brand?
Testing starts with a muslin mock-up to identify fit issues—mark pinch points, adjust curves, and re-draft your blocks. For grading, use manual rules or CAD software to expand your pattern across sizes. Digitize via scanners or CAD, export DXF/PDF files, and generate marker plans for cutting. To launch your own jeans brand, design labels, logo patches, and packaging, secure an MOQ, and leverage DiZNEW’s OEM/ODM services for sourcing, sampling, and large-scale production.

Even the most meticulous pattern can hide quirks—your next step is testing. Follow this workflow:
1. Muslin Mock-Up (Toile)
Use a cheap cotton or muslin fabric.
Sew your front and back blocks with standard 5/8 inch seam allowances.
Perform a fit session: wear the toile, squat, sit, and walk. Use chalk or pins to mark excess, tight spots, or misaligned grain.
Transfer all annotations back onto your paper pattern. This step usually resolves 80–90% of fit issues.
2. Pattern Refinement
Redraft curves, shift balance points, and adjust rise.
Double-check notch placements for pocket alignment and fly insertion.
Update seam allowance clarity and grainlines.
3. Grading for Multiple Sizes
Manual Grading: Apply standard grade rules (e.g., +3/8 inch at waist per size, +5/8 inch at hip).
Digital Grading: Use CAD software to automate size scaling. This reduces human error and accelerates turnaround. DiZNEW can provide graded patterns from size 0–24 in under 48 hours.
4. Digitization & File Preparation
Scan your finalized pattern at 600 DPI.
Vectorize curves in your CAD program (Optitex, Gerber, Lectra).
Export in industry-standard formats (DXF for plotters, layered PDFs for sewing guides).
Create marker plans to minimize fabric waste—typical fabric utilization efficiency reaches 85–90% with optimized markers.
5. Brand Launch Essentials
Logo & Label Design: Heat-press or woven labels, leather patches, care tags.
Hardware Selection: Buttons, rivets, zipper pulls—coordinate finishes with your brand palette.
Packaging: Branded polybags, hang tags, custom tissue paper.
MOQ & Lead Times: DiZNEW accommodates MOQs from 30 pcs to bulk orders of 10,000+. Sample turnaround: 10–15 days. Full production: 30–45 days.
From your first muslin to the runway, this workflow demystifies the process and empowers you to launch a jeans label with confidence. Partnering with an experienced factory like DiZNEW means you access in-house sourcing, quality control, and on-time delivery—critical for any small brand or boutique.
Conclusion and Next Steps
Congratulations! You now possess a comprehensive roadmap—from precise measurements to pattern digitization—enabling you to make your own jeans pattern, whether by hand or via PDF, for any style: skinny, baggy, plus size, or stacked. But why navigate these steps alone when you can leverage DiZNEW’s 20+ years of denim expertise?
DiZNEW specializes in:
Custom Denim Development: Over 50 fabric types, 8–16 oz weights
Sample & Production: 10–15 day sampling, 30–45 day bulk lead times
Low Minimums, High Capacity: MOQs from 30 pcs to 10,000+
Full Service: Design-to-delivery, OEM/ODM, private label, custom hardware, labeling, packaging
Expert Pattern Engineering: Manual drafting, digital CAD, grading, marker making
Whether you’re an emerging designer or an established boutique owner, DiZNEW will tailor-make your perfect jeans pattern and deliver finished garments that exceed expectations. Ready to bring your custom denim vision to life? Contact DiZNEW today for a personalized quote and let’s craft your next best-selling jeans together.

Sleek zip-up denim hoodie designed for high-street brands seeking timeless, unisex outerwear pieces.

Feminine yet edgy—baggy jeans with scattered rhinestones, heart detail, and gathered cuffs.

Utility carpenter jeans with embossed woven pockets, reinforced knee patches, side tool loop, and a relaxed straight fit.

Loaded with chains and chaos—these jeans bring punk rebellion with dirty wash and full metal drip.